
Notice
Recent Posts
Recent Comments
Link
| 일 | 월 | 화 | 수 | 목 | 금 | 토 |
|---|---|---|---|---|---|---|
| 1 | 2 | 3 | 4 | 5 | ||
| 6 | 7 | 8 | 9 | 10 | 11 | 12 |
| 13 | 14 | 15 | 16 | 17 | 18 | 19 |
| 20 | 21 | 22 | 23 | 24 | 25 | 26 |
| 27 | 28 | 29 | 30 |
Tags
- 처음 만나는 AI수학 with Python
- 데비안
- 코드로배우는스프링웹프로젝트
- /etc/network/interfaces
- 이터레이터
- 티스토리 쿠키 삭제
- 리눅스
- 처음 만나는 AI 수학 with Python
- 스프링부트핵심가이드
- 알파회계
- 자료구조와 함께 배우는 알고리즘 입문
- 목록처리
- 스프링 시큐리티
- 구멍가게코딩단
- 친절한SQL튜닝
- 네트워크 설정
- GIT
- 자바편
- 페이징
- 선형대수
- 서버설정
- 코드로배우는스프링부트웹프로젝트
- 자료구조와함께배우는알고리즘입문
- Kernighan의 C언어 프로그래밍
- baeldung
- ㅒ
- d
- network configuration
- iterator
- resttemplate
Archives
- Today
- Total
bright jazz music
blog22 : 화면 꾸미기 본문
1. 개선 후 화면 소개

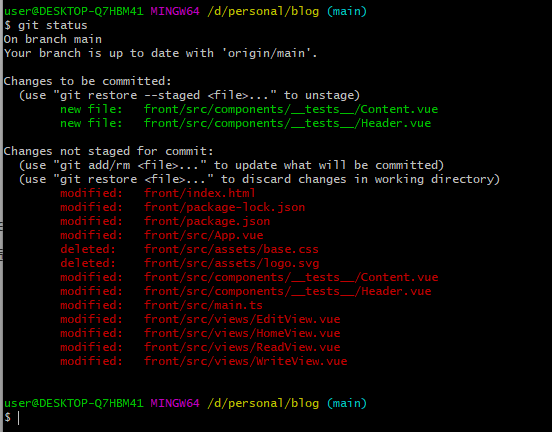
변경된 파일 확인
2. 개선 전 작업
DB에 값 넣어놓기
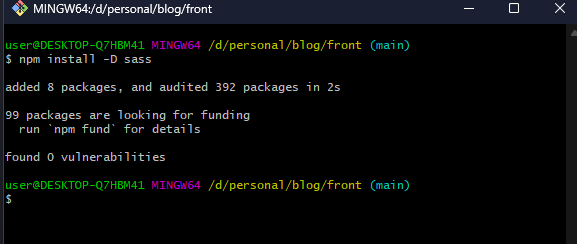
필요한 라이브러리 설치
- base.css 삭제. 방해됨
- scss 설치. (노드 서버 실행중에 설치했다면 재시작 해야 적용될 수 있음)
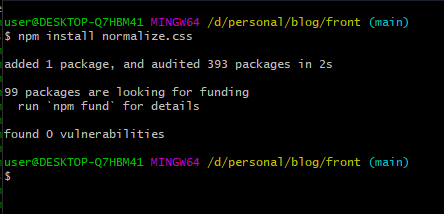
- normalize.css 설치
npm install normalize.css
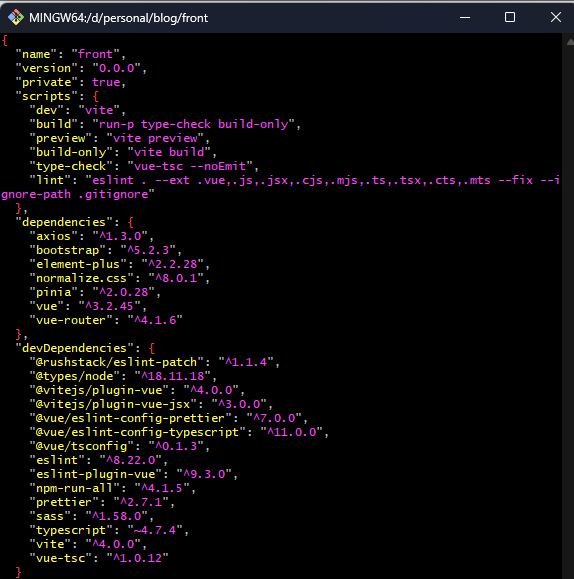
package.json 확인
3. 파일 생성 및 구조
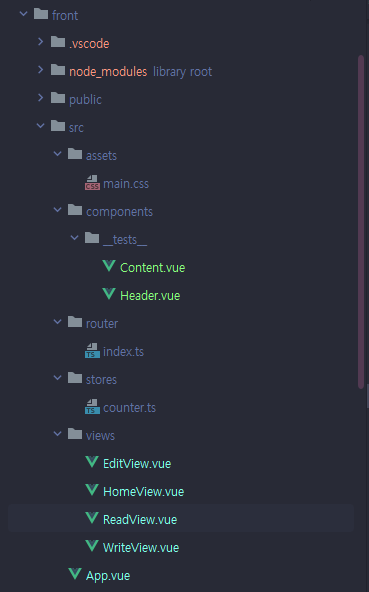
기본, 라우터 및 설정 파일
// index.ts
import { createRouter, createWebHistory } from "vue-router";
import HomeView from "../views/HomeView.vue";
import WriteView from "../views/WriteView.vue"
import ReadView from "../views/ReadView.vue";
import EditView from "../views/EditView.vue"; //경로를 적어줌으로써 import 필요

const router = createRouter({
  history: createWebHistory(import.meta.env.BASE_URL),
  routes: [
    {
      path: "/", //루트 경로라면
      name: "home", //home 뷰를 불러온다.
      component: HomeView,
    },
    {
      path: "/write",
      name: "write",
      component : WriteView //import가 필요하다.
    },
    {
      // path: "/read",
      path: "/read/:postId", //파라미터를 받을 수 있도록 설정 ######
      name: "read",
      component: ReadView,
      props: true, //해당 변수는 ReadView 컴포넌트에서 받을 수 있게 하겠다
    },
    {//수정
      path:"/edit/:postId", //postId를 같이 넘겨준다.
      name: "edit",
      component: EditView,
      props: true
    }
  ],
});

export default router;
//main.ts
import { createApp } from "vue";
import { createPinia } from "pinia";

import App from "./App.vue";
import router from "./router";

import "normalize.css" //normalize.css 임포트

import ElementPlus from 'element-plus' //element plus 추가
import 'element-plus/dist/index.css' //element plus 추가

import "bootstrap/dist/css/bootstrap-utilities.css" //bootstrap css

// import "./assets/main.css"; 사용x

const app = createApp(App); //vue.js 앱을 맨들고

app.use(createPinia()); //필요한 프러그인 사용처리
app.use(router);
app.use(ElementPlus) //element plus 추가


app.mount("#app"); //#app으로 런치 ==> index.html 렌더링하고 거기에 App.vue 컴포넌트를 렌더링
<!--index.html-->
<!DOCTYPE html>
<html lang="en">
  <head>
    <meta charset="UTF-8">
    <link rel="icon" href="/favicon.ico">
    <meta name="viewport" content="width=device-width, initial-scale=1.0">
    <!--폰트 추가: 다이나믹 서브셋-->
      <link
              rel="stylesheet"
              as="style"
              crossorigin
              href="https://cdn.jsdelivr.net/gh/orioncactus/pretendard@v1.3.6/dist/web/static/pretendard-dynamic-subset.css"
      />


    <title>Vite App</title>
  </head>
  <body>
    <div id="app"></div>
    <script type="module" src="/src/main.ts"></script>
  </body>
</html>
1. 메인
<!--App.vue-->
<script setup lang="ts">
import Header from "@/components/__tests__/Header.vue";
import Content from "@/components/__tests__/Content.vue";
</script>

<template>
  <Header/>
  <Content/>

</template>

<style>
body {
  /*margin: 0;*/
  /*width: 100%; normalize.css 적용하면서 빼버림*/
  /*폰트 적용*/
  font-family: "Pretendard Variable", Pretendard, -apple-system, BlinkMacSystemFont, system-ui, Roboto, "Helvetica Neue", "Segoe UI", "Apple SD Gothic Neo", "Noto Sans KR", "Malgun Gothic", "Apple Color Emoji", "Segoe UI Emoji", "Segoe UI Symbol", sans-serif;


}
</style>
2. 메인 내에 들어갈 컴포넌트.
component 디렉토리에 __test__라는 이름의 하위 디렉토리를 생성하여 파일 생성
<!--Content.vue-->
<template>
<el-main class="content">
<el-row>
<el-col>
<RouterView /> <!-- 실제 내용 -->
</el-col>
</el-row>
<!-- <RouterView /> <!– 실제 내용 –>-->
</el-main>
</template>
<script setup lang="ts"></script>
<style scoped>
.content {
height: calc(100vh - 60px);
}
</style><!--Header.vue-->
<template>
<el-header>
<!-- <RouterLink to="/">Home</RouterLink>-->
<!-- <RouterLink to="/write">글 작성</RouterLink> <!– 글 작성 –>-->
<el-menu mode="horizontal" router> <!-- router를 적어줌으로써 router옵션을 켠다-->
<el-menu-item index="/">Home</el-menu-item>
<el-menu-item index="/write">글 작성</el-menu-item>
</el-menu>
</el-header>
</template>
<script setup lang="ts"></script>
<style scoped>
.header {
padding: 0;
height: 60px;
}
</style>
3. 실제 view들
home
<!--HomeView.vue-->
<script setup lang="ts">
import axios from "axios";
import {ref} from "vue";
import {useRouter} from "vue-router";

const router = useRouter();

// const posts = [] 반응형 데이터가 아니면 안나옴
const posts = ref([])

//페이지, 사이즈도 넘겨야 함
axios.get("/api/posts?page=1&size=5").then((response) => {
  // console.log(response)
  response.data.forEach((r : any) => {
    // posts.push(r) 반응형 데이터는 value로 접근해야 함
    posts.value.push(r)
  });
});

//내용보기용 함수
const moveToRead = () => {
  router.push({name: "read"}); //라우터에 name이 read인 것을 push
}
</script>

<template>
  <ul>
    <!-- 반복문 사용 vue2.2.0이상부터는 v-for에 key 사용 필수-->
    <li v-for="post in posts" :key="post.id">
      <div class="title">
        <!-- 라우터 링크를 사용해서 해당 리소스만 가져옴. 요청 시 파라미터도 함께 넘김-->
        <!--반드시  :to 를 써줘야 함. -->
        <router-link :to="{name: 'read', params: {postId: post.id}}">{{post.title}}</router-link>
      </div>

      <div class="content">
        {{post.content}}
      </div>

      <div class="sub d-flex">
        <div class="category">개발</div> <!-- 미개발. 일단 하드코딩-->
        <div class="regDate">2023-02-05</div> <!-- 미개발. 일단 하드코딩-->
      </div>

    </li>
  </ul>
</template>

<style scoped lang="scss"> //scss 사용 npm install -D scass
ul {
  list-style: none;
  padding: 0;

  li {
    margin-bottom: 2rem;

    .title {
      a {
        /*background-color: black;*/
        font-size: 1.1rem;
        color: #383838;
        //밑줄 지우기
        text-decoration: none;
      }
      &:hover { //마우스 포인터 올렸을 때 밑줄 표시
        text-decoration: underline;
      }
    }

    .content {
      font-size: 0.85rem;
      margin-top: 8px;
      color: #7e7e7e;
    }

    &:last-child{
      margin-bottom: 0;
    }

    .sub {
      margin-top: 8px;
      font-size: 0.8rem;

      .regDate{
        margin-left: 10px;
        color: #6b6b6b;
      }
    }
  }
}


</style>
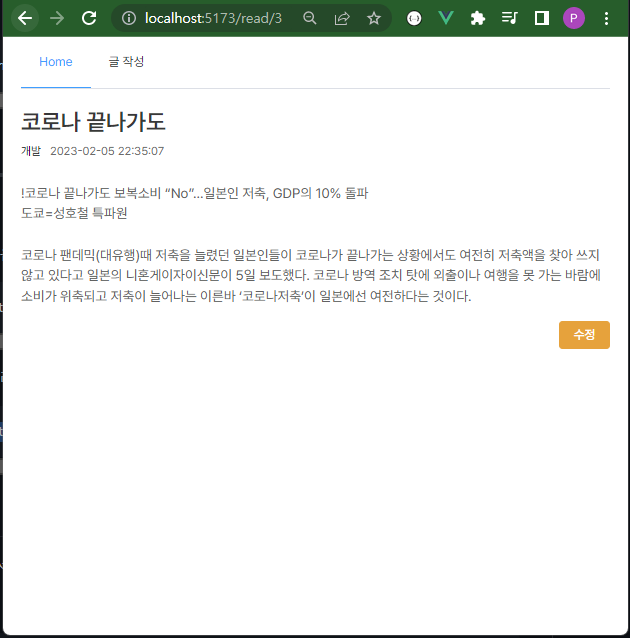
read
<!--ReadView.vue-->
<script setup lang="ts">

// 추가
import {defineProps, onMounted, ref} from "vue"
import axios from "axios";
import {useRouter} from "vue-router";

const props = defineProps({
  postId: {
    type: [Number, String], //url로 파라미터가 넘어가기 때문에 String값으로 받음. 따라서 둘다 받을 수 있도록 처리
    require: true,
  }
})

const post = ref({
  id: 0,
  title: "",
  content: "",
});
const router = useRouter();

const moveToEdit = () => {
  router.push({name: "edit", params: {postId: props.postId}}); //이름이 edit인 컴포넌트로 이동.
}

onMounted(() => {
  //console.log(props.postId) 파라미터가 잘 넘어가는 걸 확인했음.
  axios.get(`/api/posts/${props.postId}`)
      .then((response) => {
        post.value = response.data;
  });
});
// \추가


</script>
<template>

  <el-row>
    <el-col>
      <h2 class="title">{{post.title}}</h2>

      <div class="sub d-flex">
        <div class="category">개발</div> <!-- 미개발. 일단 하드코딩-->
        <div class="regDate">2023-02-05 22:35:07</div> <!-- 미개발. 일단 하드코딩-->
      </div>
    </el-col>
  </el-row>

  <el-row class="mt-3">
    <el-col>
      <div class="content">{{post.content}}</div>
    </el-col>
  </el-row>

  <el-row class="mt-3">
    <el-col>
      <div class="d-flex justify-content-end">
        <!--  수정 버튼 추가 : element plus 사용. 눌렀을 때 moveToEdit함수 실행 -->
        <el-button type="warning" @click="moveToEdit()">수정</el-button>
      </div>
    </el-col>
  </el-row>

</template>

<style scoped lang="scss">
  .title {
    font-size: 1.6rem;
    font-weight: 600;
    color: #383838;
    margin: 0;
  }

  .sub {
    margin-top: 10px;
    font-size: 0.8rem;

    .regDate{
      margin-left: 10px;
      color: #6b6b6b;
    }
  }

  .content {
    font-size: 0.95rem;
    margin-top: 12px;
    color: #616161;
    line-height: 1.5;
    //개행 효과가 없어서 아래와 같이 추가해 준다
    white-space: break-spaces;

  }
</style>
write
<!-- WriteView.vue -->
<script setup lang="ts">
import {ref} from "vue"; //ref를 사용하기 위해 import
// const axios = require('axios').default; 오류발생 :CommonJS형태가 아니기 때문.
import axios from 'axios'
import {useRouter} from "vue-router"; //###Router 추가
// 따라서 이렇게 import
const title = ref("") //입력받은 값을 저장할 변수 선언
const content = ref("") //입력받은 값을 저장할 변수 선언
//###Router 추가
const router = useRouter();
//WriteView.vue
const write = function() {
// axios.post("http://localhost:8080/posts",
// axios.post("/posts", //전체 도메인이 아니라 path에 대한 것만 적어야 vite.config.ts에서 프록시 처리 가능.
// axios.post("/api/posts", //앞에 /api만 붙여주면 개별 api에 대한 처리를 vite.config.ts에서 해줄 필요 없다.
// //RequestBody
// {
// title: title.value,
// content: content.value
// });
axios.post("/api/posts",
//RequestBody
{
title: title.value,
content: content.value
})
.then(() => { //###Router 사용: 글 작성완료하면 홈으로 이동
// router.push({name: "home"}); //라우터 index.ts에 적힌 이름.
//그런데 push로 하면 뒤로 돌아갔을 때 작성화면으로 돌아감.
//이를 방지하고 싶어서 push대신 replace 사용
router.replace({name: "home"}); //라우터 index.ts에 적힌 이름.
});
}
</script>
<template>
<div class="mt-2">
<!-- 선언한 title, content 변수를 아래 v-model 태그에 넣는다.-->
<el-input v-model="title" placeholder="제목을 입력해 주세요"/>
</div>
<div class="mt-2">
<el-input v-model="content" type="textarea" rows="15"></el-input>
</div>
<div class="mt-2">
<div class="d-flex justify-content-end">
<el-button type="primary" @click="write()">글 작성 완료</el-button> <!--눌렀을 때 write() 함수 호출 -->
</div>
</div>
</template>
<style>
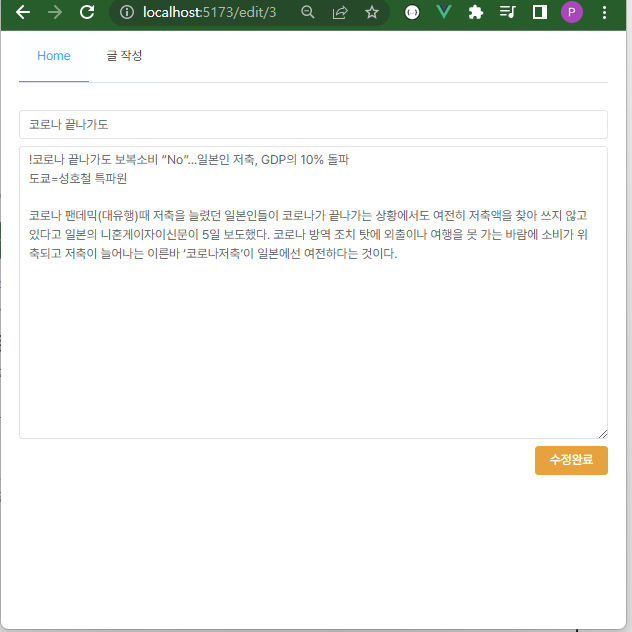
</style>edit
<!-- WriteView.vue -->
<script setup lang="ts">
import {ref} from "vue";
import axios from 'axios'
import {useRouter} from "vue-router";

const title = ref("") //입력받은 값을 저장할 변수 선언
const content = ref("") //입력받은 값을 저장할 변수 선언

const router = useRouter();
const post = ref({
  id: 0,
  title: "",
  content: "",
})

const props = defineProps({
  postId: {
    type: [Number, String],
    require: true
  },
});
//해당 포스트 Id보내서 객체 가져온 뒤 다시 뿌려주기
axios.get(`/api/posts/${props.postId}`).then((response) => {
      post.value = response.data;
});

//수정값 보내기. 그리고 home으로 돌아가기
const edit = () => {
  axios.patch(`/api/posts/${props.postId}`, post.value).then(() => {
    router.replace({name: "home"})
  });
};

</script>

<template>
  <div class="mt-2">
    <el-input v-model="post.title"/>
  </div>

  <div class="mt-2">
     <el-input v-model="post.content" type="textarea" rows="15"></el-input>
  </div>

  <div class="mt-2 d-flex justify-content-end">
    <el-button type="warning" @click="edit()">수정완료</el-button> <!--눌렀을 때 write() 함수 호출 -->
  </div>

</template>

<style>
</style>
https://github.com/hojuncha997/blog
'Projects > blog' 카테고리의 다른 글
| blog 24 : 애플리케이션 프로세스 유지하기 (0) | 2023.02.08 |
|---|---|
| blog21 : 배포 준비(빌드) (0) | 2023.02.06 |
| blog21 : 글 수정 화면 만들기 (0) | 2023.02.04 |
| blog20 : 글 내용 화면 만들기 (0) | 2023.02.04 |
| blog19 : 글 리스트 화면 만들기 (0) | 2023.02.03 |
'Projects/blog' Related Articles
more


Comments