Notice
Recent Posts
Recent Comments
Link
| 일 | 월 | 화 | 수 | 목 | 금 | 토 |
|---|---|---|---|---|---|---|
| 1 | 2 | 3 | 4 | 5 | 6 | 7 |
| 8 | 9 | 10 | 11 | 12 | 13 | 14 |
| 15 | 16 | 17 | 18 | 19 | 20 | 21 |
| 22 | 23 | 24 | 25 | 26 | 27 | 28 |
Tags
- 자료구조와 함께 배우는 알고리즘 입문
- 자료구조와함께배우는알고리즘입문
- 네트워크 설정
- ㅒ
- 서버설정
- 처음 만나는 AI수학 with Python
- 친절한SQL튜닝
- baeldung
- 코드로배우는스프링부트웹프로젝트
- 데비안
- GIT
- 목록처리
- 자바편
- 선형대수
- 코드로배우는스프링웹프로젝트
- /etc/network/interfaces
- 티스토리 쿠키 삭제
- 스프링부트핵심가이드
- resttemplate
- 리눅스
- Kernighan의 C언어 프로그래밍
- 구멍가게코딩단
- 알파회계
- 이터레이터
- network configuration
- 처음 만나는 AI 수학 with Python
- 스프링 시큐리티
- d
- 페이징
- iterator
Archives
- Today
- Total
bright jazz music
blog 30 : 고정인증 로그인 기능 구현 2 본문
현재 DB에 값이 들어가 있지 않아 테스트가 번거롭다. 따라서 스프링을 실행할 때 sql파일을 추가하여 자동으로 값을 밀어 넣는 방법을 사용한다.
1. data.sql 파일 생성
data.sql 파일을 생성하여 resource 폴더 아래에 위치시킨다. 그 다음 application.yml 또는 application.properties 파일의 jpa설정을 수정한다.
User엔티티 파일에 맞춰 sql 파일을 생성한다.
-- data.sql --
INSERT INTO `users` (name, email, password, created_at) values ('catnails', 'catnails@gmail.com', '1234', '2023-02-14 21:58:00');
'가 아니라 `이다. 정 껄끄러우면 안 붙여도 들어간다.
2. application.yml 수정
#application.yml
spring:
  h2:
    console:
      enabled: true
      path: /h2-console

#0이 아닌 1부터 시작하는 걸로 하겠다는 의미
  data:
    web:
      pageable:
        one-indexed-parameters: true
        default-page-size: 20
        max-page-size: 2000

# 추가
  sql:
    init-model:always


  #jpa설정
  jpa:
    defer-datasource-initialization: true


  datasource:
    url: jdbc:h2:mem:blog
    username: sa
    password:
    driver-class-name: org.h2.Driver
서버기동

3. UserRepository 수정
//UserRepository.java

package com.endofma.blog.repository;

import com.endofma.blog.domain.User;
import org.springframework.data.repository.CrudRepository;

import java.util.Optional;

public interface UserRepository extends CrudRepository<User, Long> {
    Optional<User> findByEmailAndPassword(String email, String password);

}
4. AuthController 수정
//AuthController.java

package com.endofma.blog.controller;

import com.endofma.blog.domain.User;
import com.endofma.blog.exception.InvalidRequest;
import com.endofma.blog.exception.InvalidSigninInformation;
import com.endofma.blog.repository.UserRepository;
import com.endofma.blog.request.Login;
import lombok.RequiredArgsConstructor;
import lombok.extern.slf4j.Slf4j;
import org.springframework.web.bind.annotation.PostMapping;
import org.springframework.web.bind.annotation.RequestBody;
import org.springframework.web.bind.annotation.RestController;


@Slf4j
@RestController
@RequiredArgsConstructor
public class AuthController {

    //생성자를 통한 주입
    private final UserRepository userRepository;

    @PostMapping("/auth/login")
    public User login(@RequestBody Login login){

        //json ID/PW
        log.info(">>> login = {}", login.toString());

        //DB에서 조회
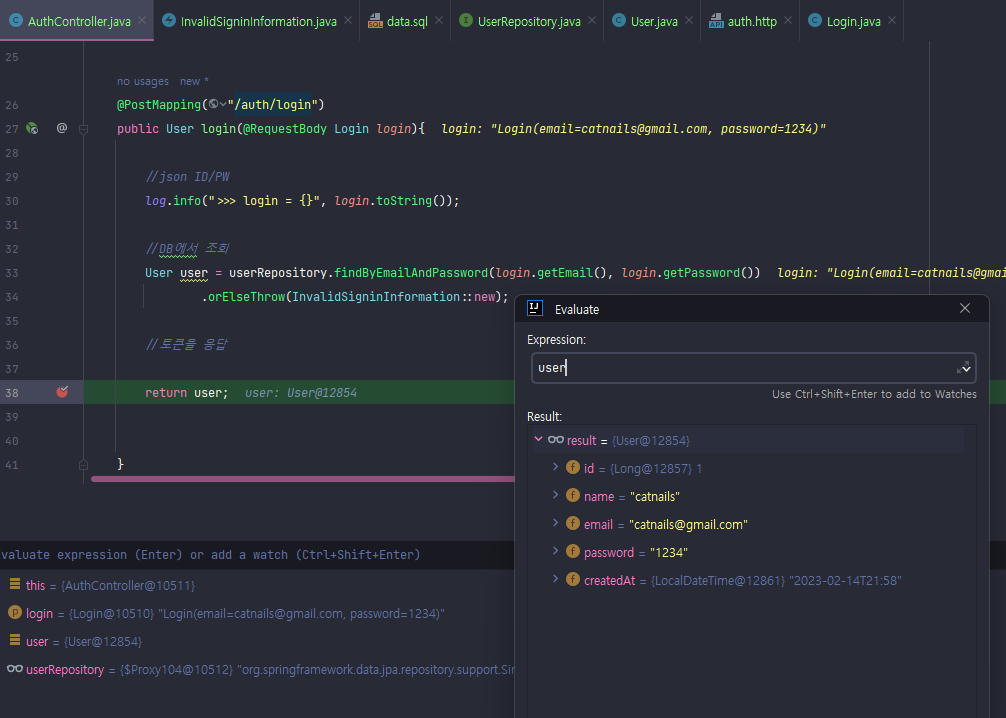
        User user = userRepository.findByEmailAndPassword(login.getEmail(), login.getPassword())
                .orElseThrow(InvalidSigninInformation::new);

        //토큰을 응답

        return user;


    }
}
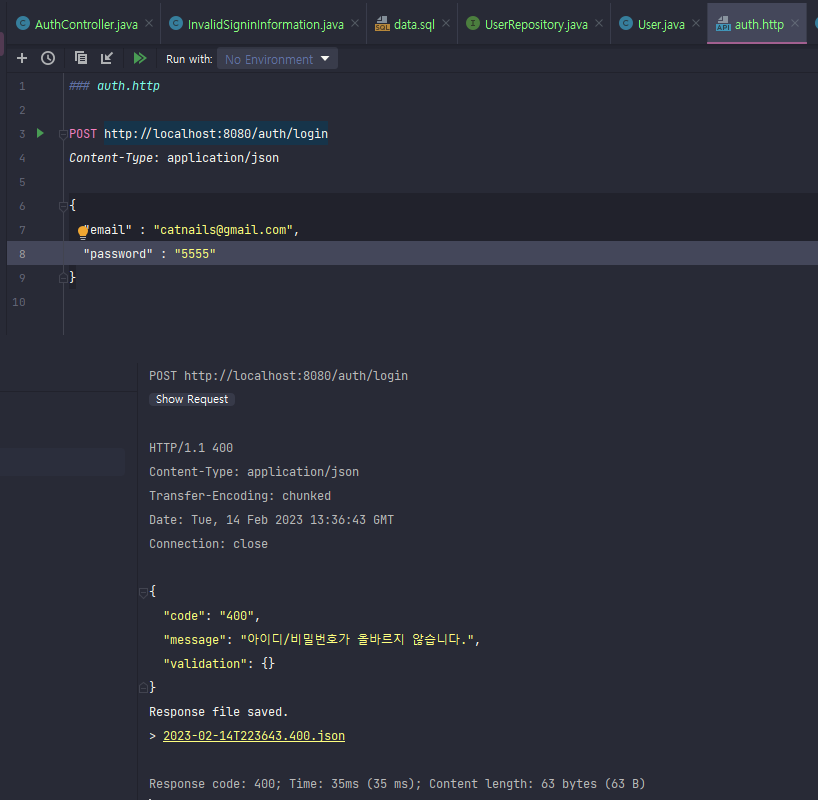
성공시 User객체 반환 실패 시 에러 반환
재기동 후 auth.http로 요청 테스트


'Projects > blog' 카테고리의 다른 글
| blog 31 : 세션 토큰 발급기능 추가 2 (0) | 2023.02.15 |
|---|---|
| blog 31 : 세션 토큰 발급기능 추가 1 (0) | 2023.02.15 |
| blog 30 : 고정인증 로그인 기능 구현 1 (1) | 2023.02.14 |
| blog 29 : 헤더 인증으로 변경, Intellij http (0) | 2023.02.13 |
| blog 28 : ArgumentResolver 사용해보기 (0) | 2023.02.10 |
Comments


